


Who is this article for?All Staff wanting to review the evolution of Issues from the Native app
Your Staff can have access directly from the Native app to see and manage the Issues raised in your Org. This article will cover:
- Where to find the Issues
- How the Issues are created
- Filter and Sort your Issues List
- Editing the Issue
- Re-assigning Issues
- Commenting on Issues
- Starting and Closing Issues
1. Where to Find Issues
Your Issues can be found by selecting the middle icon at the bottom of the screen.
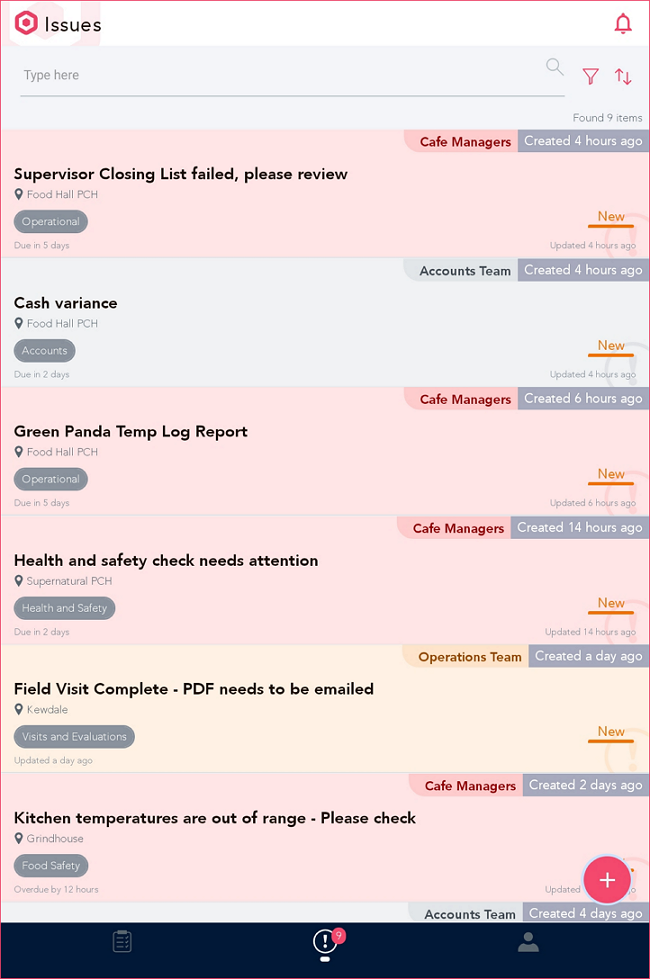
2. How Issues are Created
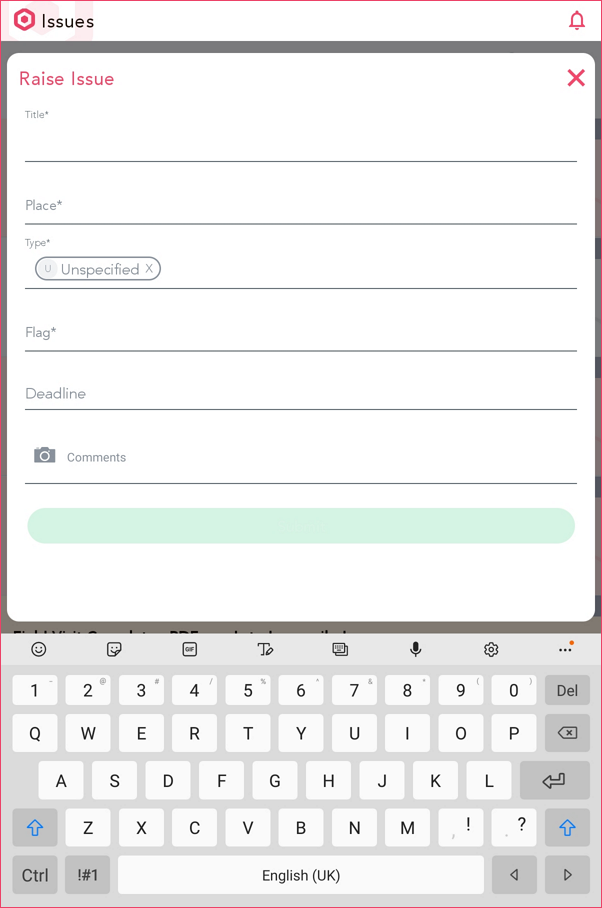
As seen in the article Raising Issues from Op Responses, Issues are raised automatically from the completion of an Op configured using Issue Form Flow, or ad-hoc by selecting the plus + button in the bottom right corner of the screen.
When raising issues on-demand, the user can:
- Give the Issue a title
- Select a Place where this Issue occurred/was found
- Assign the Issue a Type
- Assign the Issue a Flag (or priority)
- Set a Deadline for the Issue to be resolved (optional)
- Include photos or comment on the Issue (optional)
3. Filter and Sort Your Issues List
From your Issues list, you can sort and filter the entries based on the various criteria configured in your Issue settings (review our Ops and Issues Settings article).
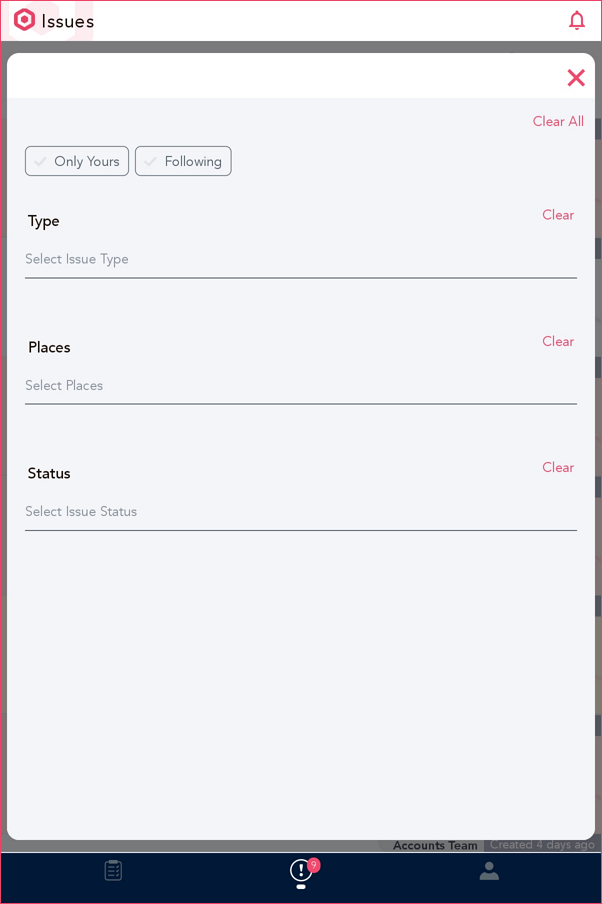
To refine your search, select the Funnel icon in the top right corner of the screen to open Filters. From this screen, you have the ability to narrow down the content by:
- Type
- Places
- Status
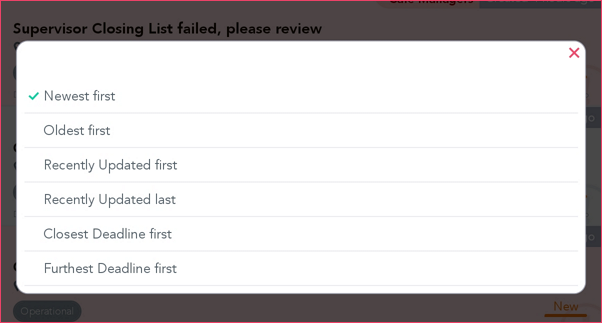
To sort the entries in your Issues List, select the Arrows icon in the top right corner of the screen to open Sorting. From this screen, you have the ability to change the order of the content.
4. Editing the Issue
As the Assignee for an Issue or as Primary Admin, you have the ability to edit Issues from the Native app as well.
First, click on the Issue that you would like to make changes to; then select the Edit button in the bottom right corner of the screen.
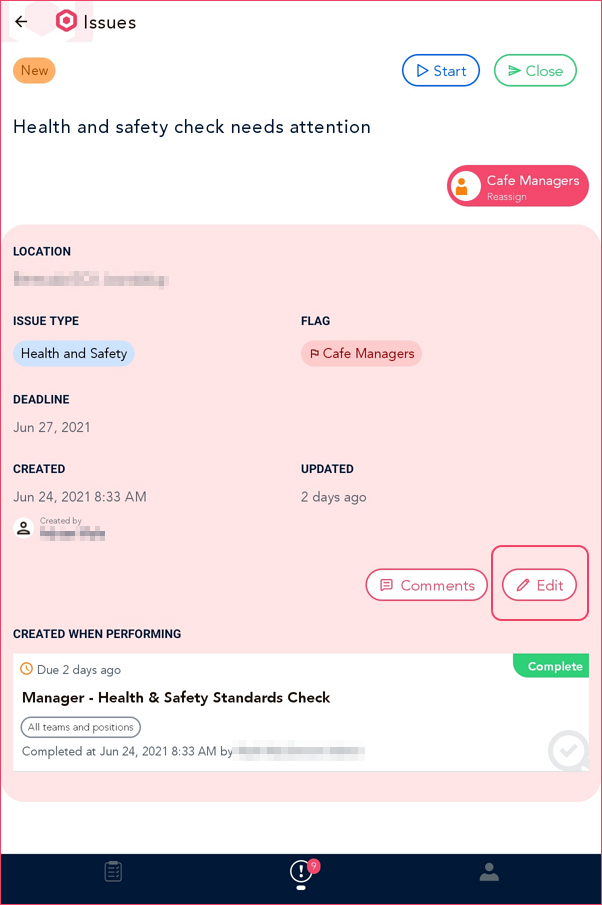
From here you can amend:
- the Issue Title
- the Issue Type
- the Issue Flag (priority)
- the Issue Deadline for it to be resolved
5. Re-assigning Issues 😏
If you would like to re-assign the Issue to another Team, Position or Staff member, select the bubble that states who it is currently assigned to. Below the name, you should also see it says Reassign.

Keep in mind, the only choices listed will be from the Place the Issue is assigned to
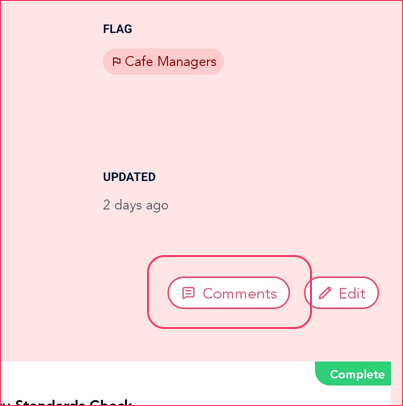
6. Commenting on Issues
If the Issue is assigned to you specifically (or a Position/Team that you belong to), you have the ability to comment on Issues.
To add a comment, click on the Comments button in the middle of the screen.
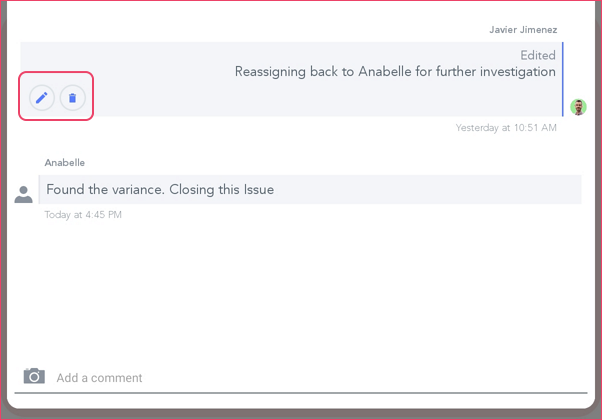
You also have the ability to amend or delete your comments by selecting the Edit or Bin icon, respectively. Only the author of a comment can edit or delete it.
7. Starting and closing Issues
When a New Issue is raised, select Start to change its status to In progress and indicate it is being worked on.
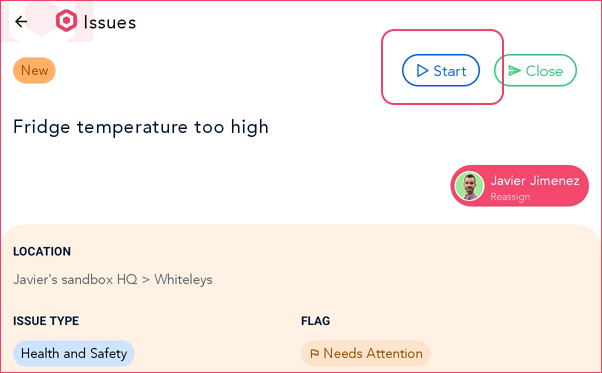
Once an Issue has been resolved, select Close to change the Issue's Status from In progress to Closed.
Article Comments
0 comments